

There is an improved and better blog post on installing OpenCV here on Ubuntu which will work regardless of whether you have Anaconda Python as your default Python or not. Please refer to that. I am leaving this post online purely in the interest of seeing the approach with which I had tackled the problem earlier
Before you get started, you must know this, that even as of OpenCV3.1, documented support is there only for VTK5.1, which is compatible with QT4, and so, for all the scripts provided on this webpage, we will be using QT4, not QT5
If directly using Python on Ubuntu, please refer to the other blog post on installing python for ubuntu directly
If using Anaconda Python, you might face problems on building OpenCV. However, after a lot of attempts, I managed to get OpenCV3.1+contrib working on Ubuntu 16.04 with Anaconda Python 3. This is a brief guide to help you overcome the commonly occurring problems
If at any point of time, you are re-building with or without changed cmake parameters, then make sure you remove partial built files
$ sudo rm -rf opencv/build/ opencv/CMakeLists.txt opencv/cmake/
$ cd opencv
$ git reset --hard HEAD
$ cd ..
In short, it will suffice if you download the following two scripts (preparatory and building), give the appropriate permissions with
$ chmod 755 4\ -\ opencvPreReq.sh
$ chmod 755 5\ -\ opencvInstall.sh
Place both the scripts in the parent folder of where you would like OpenCV to be installed
Run the preparatory file first
$ ./4\ -\ opencvPreReq.sh
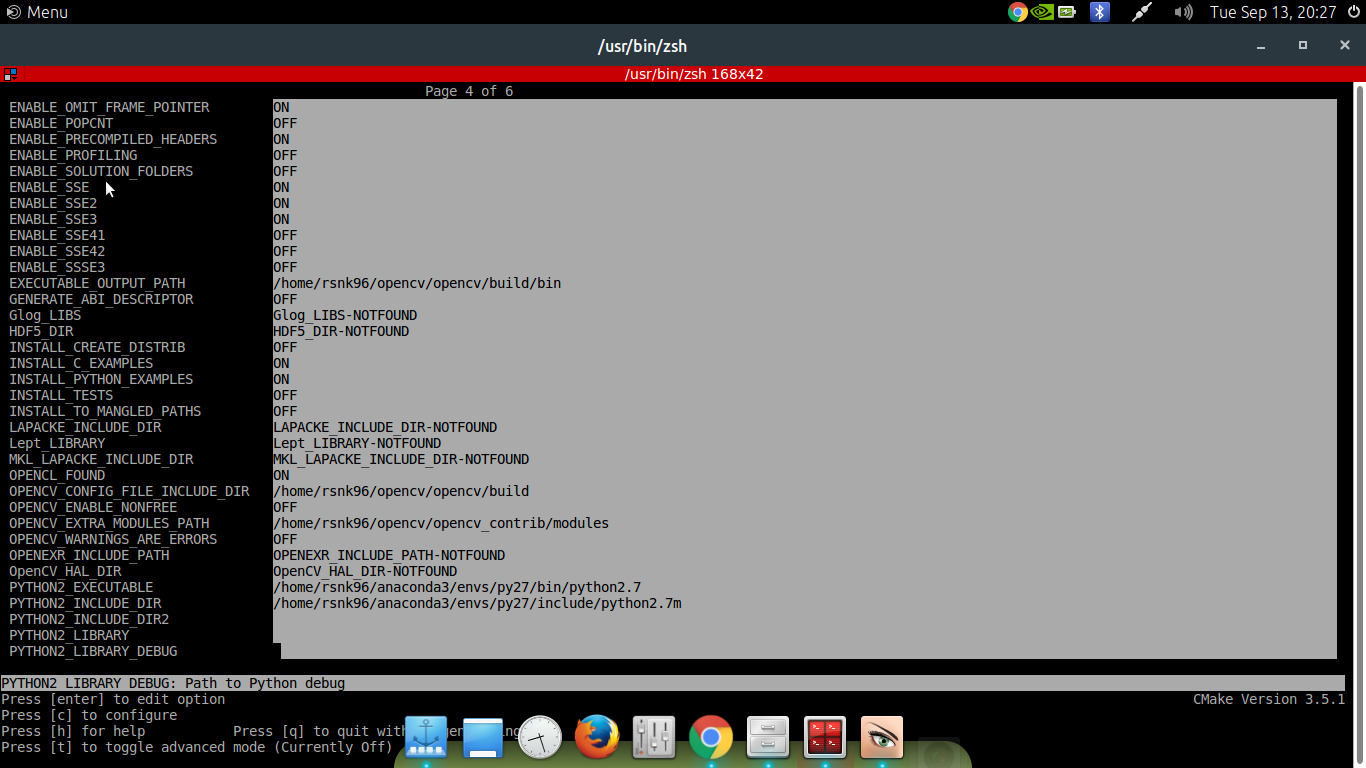
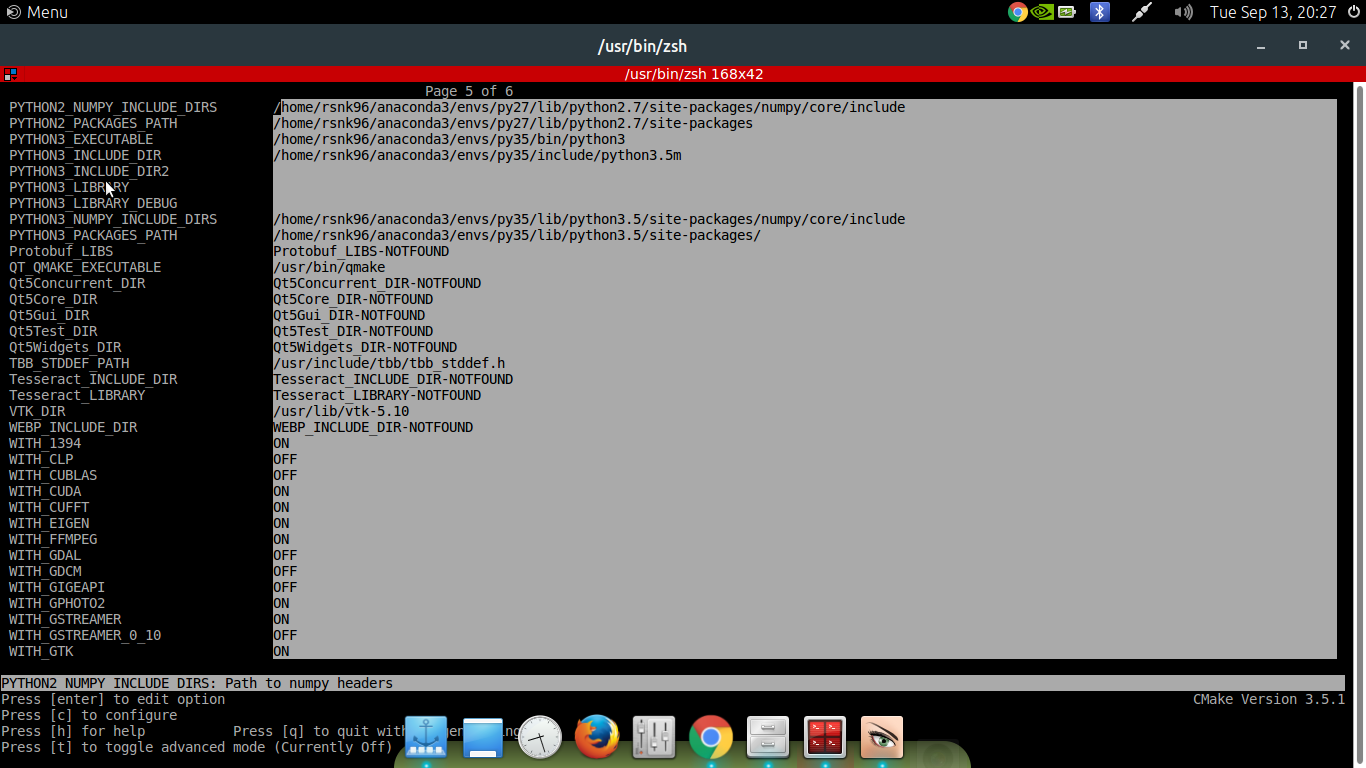
Now, before running the actual building script, note that you MUST have anaconda removed from the environment PATH variable as otherwise, it detects a partial Conda-compliant version of QT5, which will lead to the final built openCV being unusable. Most likely, conda will be added to your shell starting code (.bashrc or .zshrc, for instance). After you have done that,
$ ./5\ -\ opencvInstall.sh
After the initial configuration, a ccmake prompt will come up, which lets you change the cmake parameters. As you have removed Anaconda Python from your PATH variable, it will not be detected by CMAKE. Hence, you have to manually input the location of your python variables (REFER: Images below. Replace /home/rsnk96/anaconda3 with your installation path). Press enter, and finish the building
You might additionally face the problem of mismatched libtiff when building. If that is the case, remove libtiff from your system, use conda remove to remove libtiff from all your anaconda environments, and then run the shell script, which will build libtiff by itself
Aaah you really don’t have to do anything after this. Just let the script do its job :-D
fatal error: ft2build.h: No such file or directory, it is most likely because you have freetype enabled in contrib. Disable it using ` -DBUILD_opencv_freetype=OFF ..`
If you face any problem not mentioned here, feel free to ping me :-)